The final result of this work will give each person a (more or less) permanent face casting from which we can cast as many positives as necessary to do multiple types of prosthetics....everything from Klingon foreheads to full alien faces, from facial wounds to anthrophomoric features.
However, while it was extremely awesome and creative..and very exciting. It was several weekends worth of work broken up over several months.
There are two major parts of this process:
Part 1: create all face casts using plaster & prep them for molding
Part 2: mold all face casts in resin & fiberglass.
And each part had a a lot of little parts to it.
Of course, this original plan (which was to take place over one weekend) hinged on a few things: 1) everything happening according to schedule and 2) the weather. Obviously, these two things are never 100% reliable.
The weather was the biggest impact. There was no way we were going to be able to use resin & fiberglass with the storm, the humidity, and the cold. So, while we finished Part 1, there was no way we were going to finish Part 2 until it got warmer with no chances of rain.
This post is about the Part 1 Process, which ended up being 1.5 weekends. (Part 2 will be a separate post.) I tried to take as many possible photos with my iPhone during the process, but failed to take a photo every step.
Without going into too much detail about how this process is done (you can find plenty of instructions on the Internet), each face casts involves:
- Prepping the person with baldcaps, cotton balls, mold release. etc.
- Putting the alginate molding material on that person's face/head. (This took 3 people)
- Add the necessary binders (2 people)
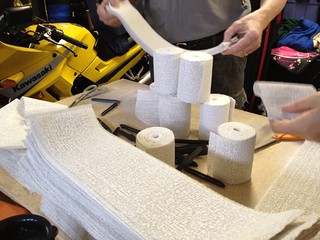
- Wrap the person's face with plaster bandages (4 people in an assembly line)
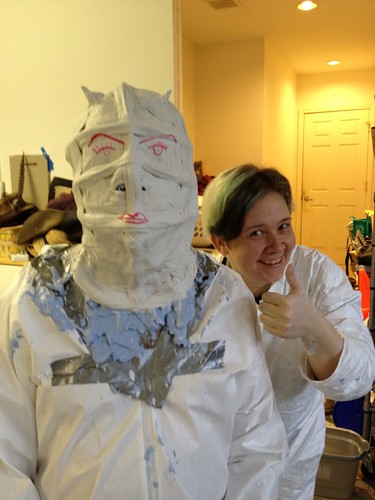
- Waiting for everything to set, while having some fun with that person
- Peel the finished cast off the person's head.
- Rinse & repeat for the next person.
Then while the next person was prepped, a few people would
- Prepare the the finished face mold with a releasing agent
- Pour plaster into the face mold for the positives (2-3 people)
- Go help on the next person.

It takes about 30-45 minutes to do one person's head completely, once we got the 'hang' of it. (And of course, we had a bit of fun with each person who got casted.....)

Then, it took some time for the plaster "positives" to dry. As the day wore on (and got colder), it took longer for each positive to dry.
We finished the last face cast at about 8:30pm (we started at about noon), but still had to wait for the last few positives to dry (which was about midnight)
On another day, we prepped the plaster positives. Air bubbles and imperfections from the plaster molds had to be sanded & smoothed out with a variety of tools. And problem spots (such as an imperfect ear/nose, chin, etc) had to be touched up with clay, and in some instances, re-created completely. For example, the underside of my chin wasn't properly casted, so I had to stare in the mirror and fix the chin on the plaster version of myself.

Here are the finished plaster positives with their clay "fixes."
I will post about the 2nd half of this process in another entry.
No comments:
Post a Comment